

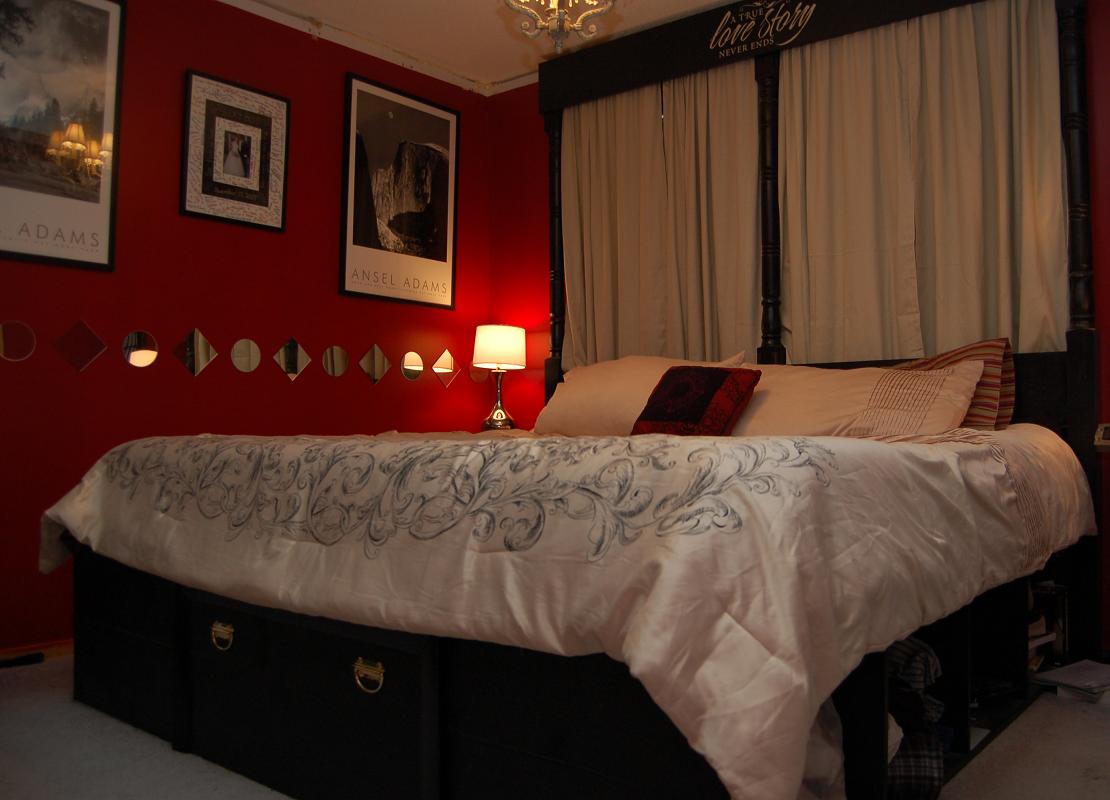
When I started out, our bed was a simple king bed — just a metal frame, box springs, and a mattress. I wanted to give our bed presence in the room, and thought a headboard would do the trick. After trying and failing to find an inexpensive headboard, I quickly came to the conclusion that a building a simple DIY platform bed would be the best option, and I will show you how I did it!
Making Preparations
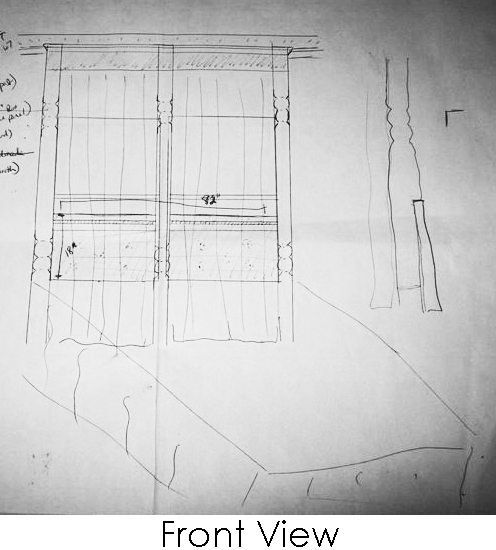
I drew a picture to help myself plan out the general look of the finished product. Google SketchUp is a free 3D drawing tool that would have made designing my king platform bed much easier, but I didn’t find out about that until later.
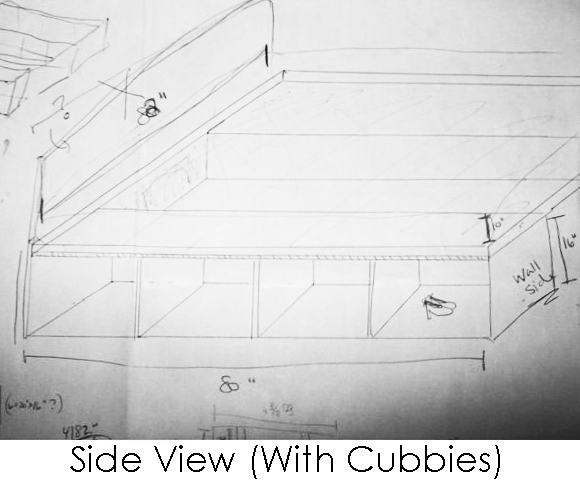
After strolling through a home improvement store, I decided on attaching the headboard to the wall with some fence posts and brackets, to ensure full stability. I then designed a new base for the bed with cubbies for storage.
I purchased about $350 worth of lumber and hardware, which was way below anything I could find online or at a furniture store, and set to work.
Building the Bed
With all of my preparations, I was able to build the bed in one Saturday! I began by building the headboard. I attached two of the poles to the wall just outside the window frames. I cut the boards that would make the backrest to length and attached it to the back of the third pole, which I had notched out. I attached the third pole to the wall and secured the ends of the backrest to the other two poles with some leftover 2×4’s. To finish the headboard, I built a cornice piece to cover up the ends of the poles.
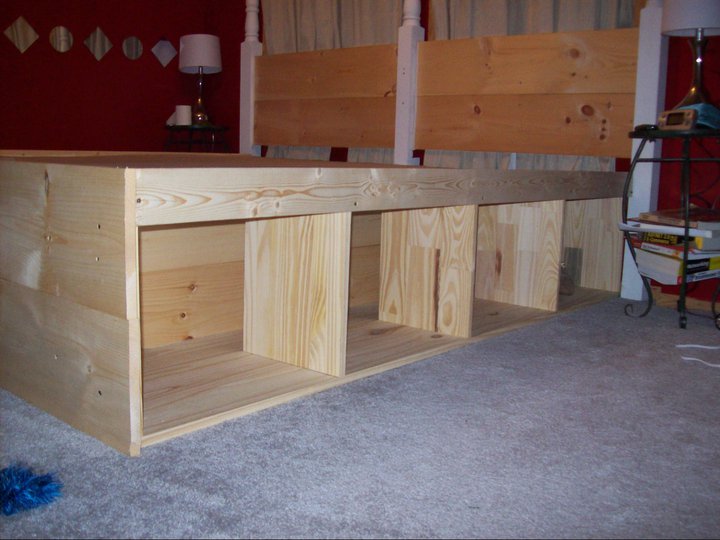 Then it was on to the cubbies. I drilled pilot holes in the ends of the dividers so I wouldn’t split the wood. The wood for the dividers didn’t span the depth of the cubbies in order to help reduce the overall cost. I attached the dividers to the bottom board and attached a board to the back, leaving the top open. I cut a piece of chipboard and placed it in the center and placed the cubby sections on the outside.
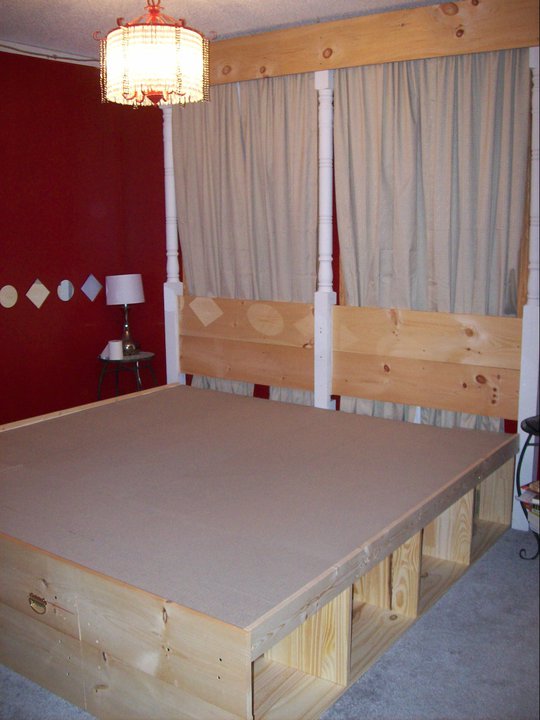
I screwed some 2×4’s into the top of the middle section to provide support. Then I topped the whole thing in chipboard and screwed it down. I glued area rug gripper to the top of the chipboard so it created a smooth, non-slip surface for our foam mattress. I finished off the bed by screwing boards to the foot of the bed and a small board to the rails.
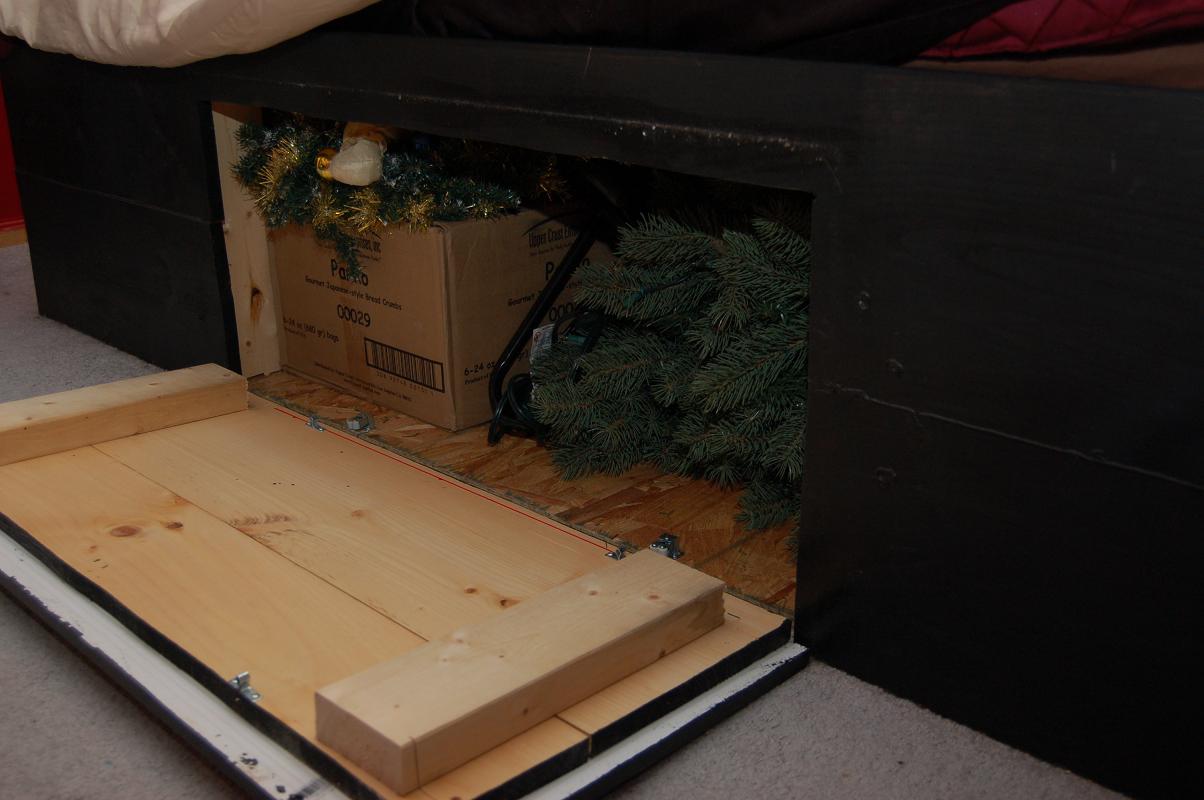
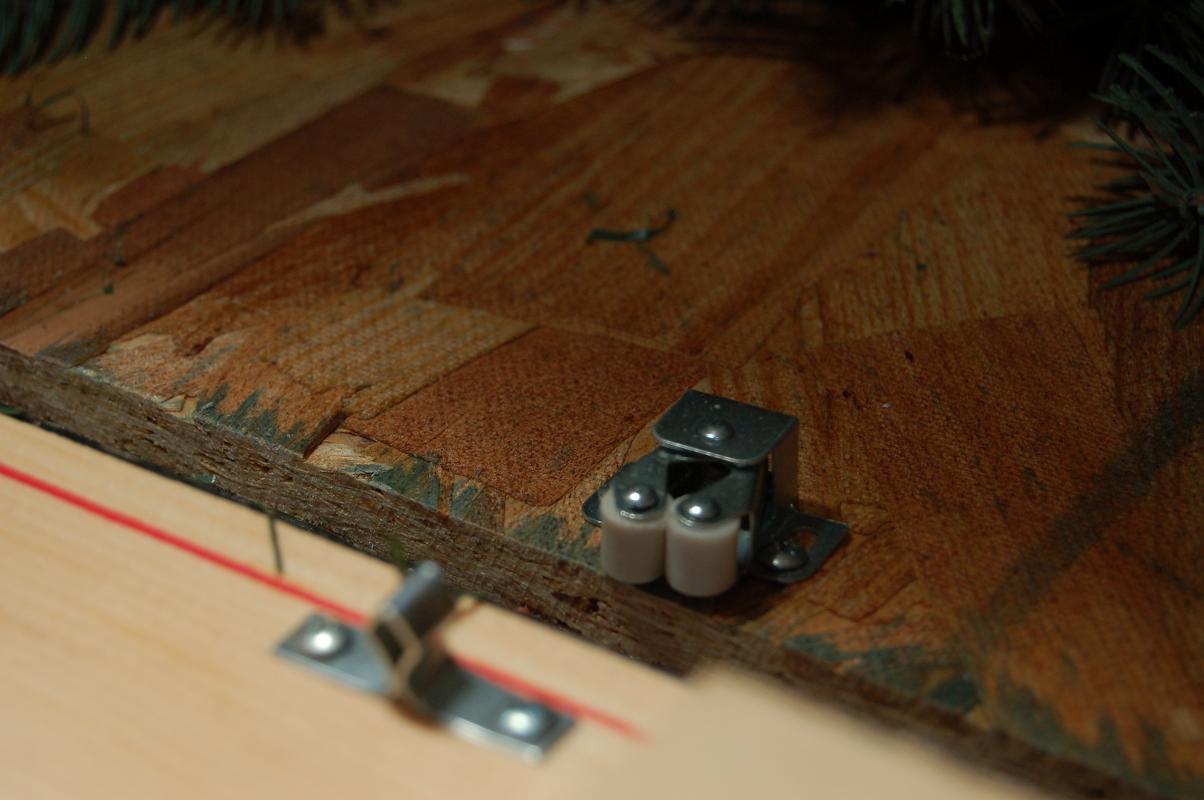
In an effort to utilize all the space under the bed, I cut out a panel at the foot of the bed so we could access the space in the middle. I attached hardware so the panel snaps back in place, handles to pull it out, and I covered the edges with molding to hide the seam.
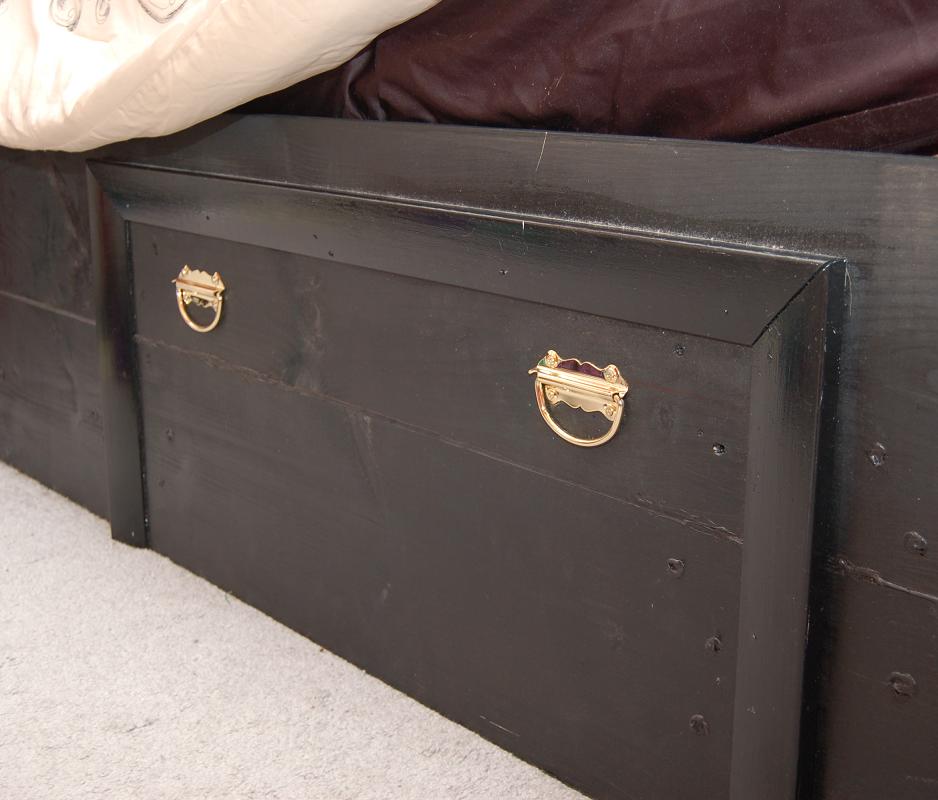
I was unable to paint the bed that day, but I eventually painted it black. I used some black caulk to fill in seam on the backboard and cover any exposed screw heads. Finally, I added a wall embellishment to the cornice section of the headboard and the bed was complete!


Creating this simple DIY platform bed was my most ambitious project ever! I have the fortune of being related to some pretty awesome people who helped with the planning. My brother helped me eliminate about half of the 2×4’s I thought I would need for the center bracing, and my dad informed me that I could cut a straight line with a circular saw by clamping 2×4’s as a guide to the board I was cutting. And that is how I designed and built my simple DIY platform bed!
